Subscriber Pages let you customize what your contacts see when they unsubscribe or update their preferences. You can set them up for all Groups or tailor them for individual Groups, so every contact gets a clear, on-brand experience. This helps reduce unnecessary unsubscribes, keeps your contact preferences accurate, and protects your sender reputation.
Who can use this feature? Anyone
Available on: Free, Starter, Growth, Advanced and Ultimate
What is a Subscriber Page?
When a contact clicks to unsubscribe from one of your emails or to update their preferences, Transpond takes them to a Subscriber Page:
- Unsubscribe
- Update Your Profile
These pages are fully customizable, so you can make sure the experience matches your brand and gives your contacts the right options.
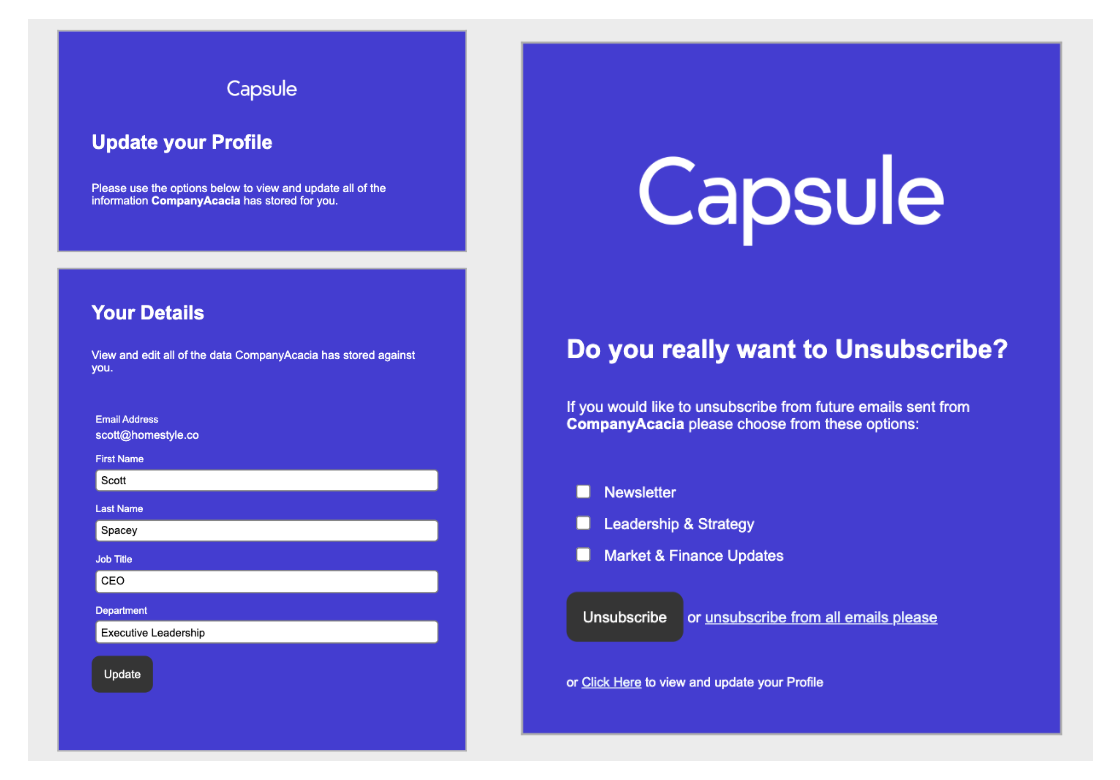
📙 By default, Contacts will see a list of the Groups they are currently part of. If needed, learn how to hide a Group from the Unsubscribe page.
Customizing Subscriber Pages
You can set up one design to apply across all of your Groups, or create separate pages for individual Groups if different audiences need a different look or message.
Edit Subscriber Pages for all Groups
- In Transpond, click on your name in the top right corner > Account Settings.
- Go to the Subscriber Pages tab, click on the Edit button next to the Subscriber page you want to edit.
Edit Subscriber Pages per Group
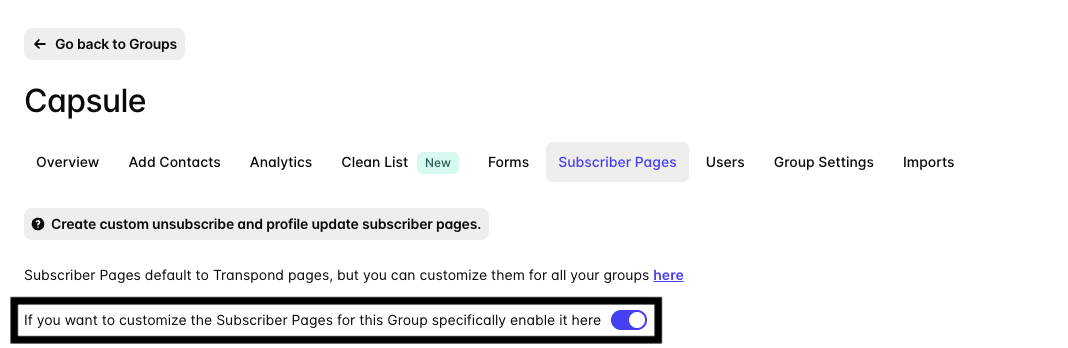
- In Transpond, go to the Contacts tab, then click on the name of the Group.
- On the Subscriber Pages tab, use the toggle to turn the option on.
- Choose the Edit button next to the Subscriber page you want to edit.
Subscriber Page Fields
Subscriber Pages use Merge Tags to add personalised information from your Transpond account.
Both Unsubscribe and Update your Profile subscriber pages include the following fields:
- {{companyname}} - taken from the Company Name field in Account Settings > My Company
- {{unsubscribeOptions}} - inputs Unsubscribe or Unsubscribe from all into the view
Updating Fields
On the Update your Profile Page, you will also find {{updatefields}}. This Merge Tag will show their Email address by default.
To make a specific field visible (and therefore updatable):
- Go to Contacts > All Contacts
- Click on the Custom Fields tab
- Use the checkbox in the Hidden column to either hide/unhide it from the Subscriber Page.
Contacts will not be able to update their Email address whilst updating their preferences, as this is the unique identifier for their Contact.
Subscriber Page Defaults
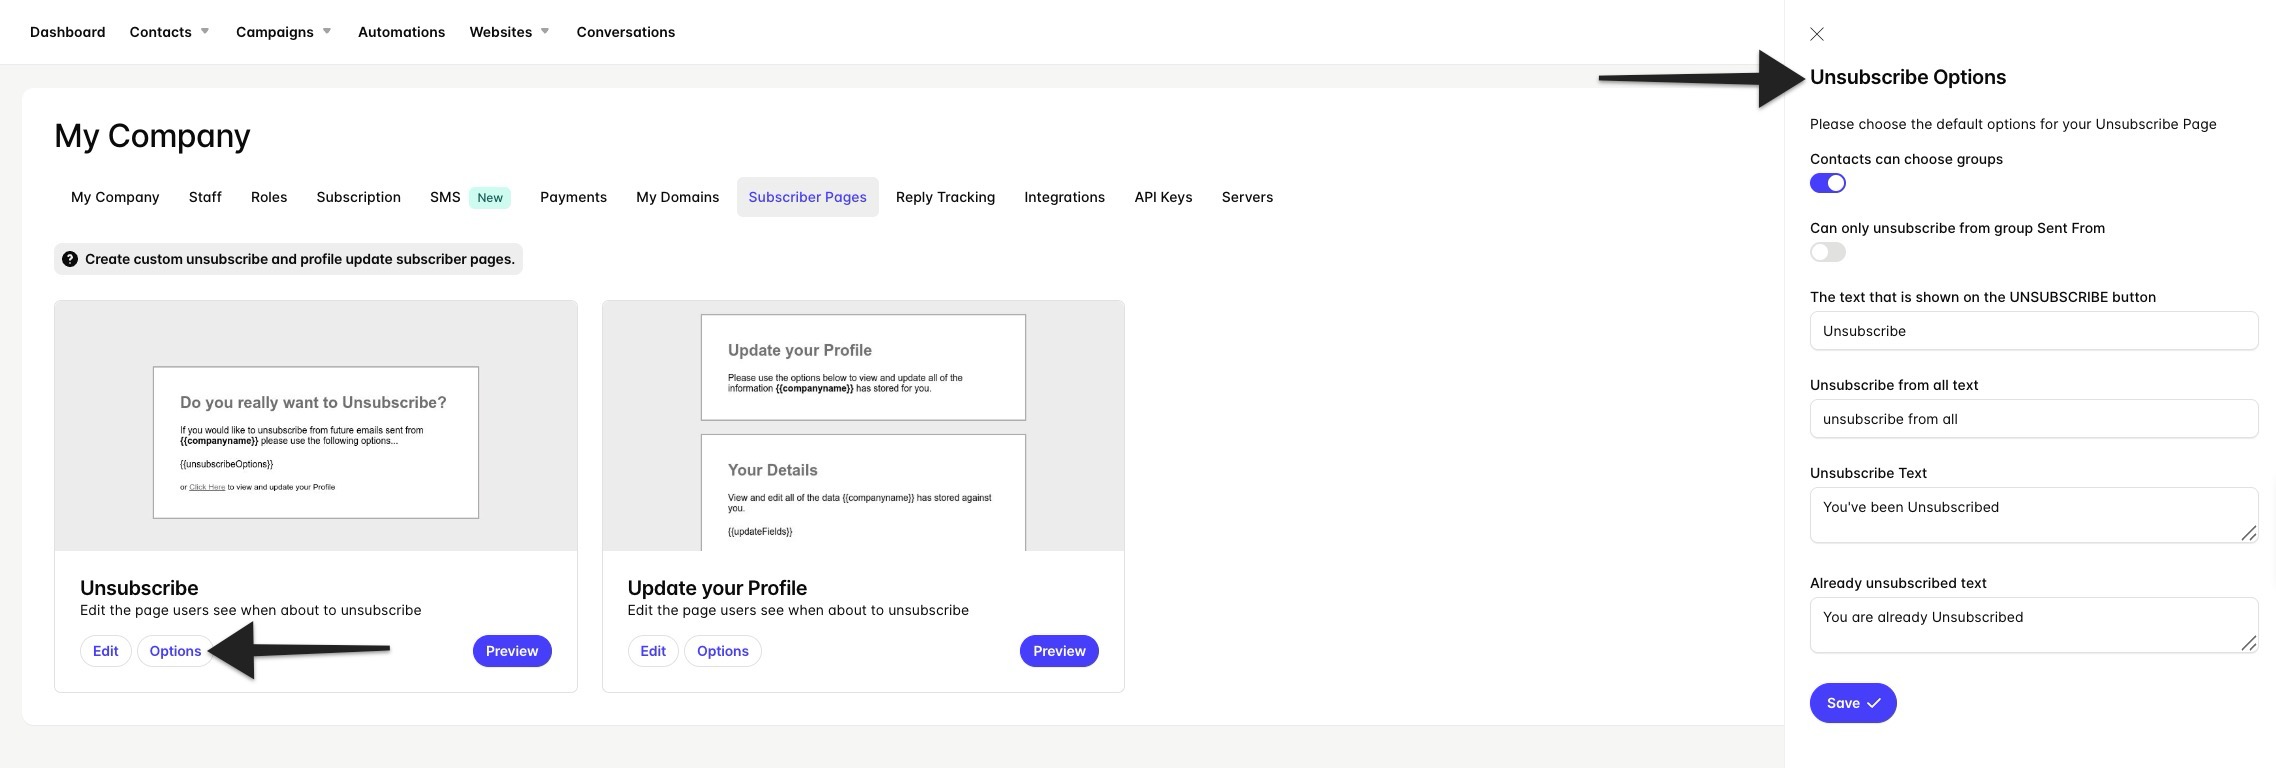
There are a number of defaults you can set for each Subscriber Page to customize the experience for your Contacts. To do this, use the Options button under each page.
This includes the settings to:
- Edit the display text for a specific button
- Edit the following display text after clicking a specific button
- Choose how much control the Contact has over the Groups they are a part of